hi!
I couldn't think of a proper "first blog post", so here is a short tutorial on how I edit my drawings for use on my custom fabrics.
step one: acquire an image of the drawing
normally i'd scan my drawings in, but my scanner was being a butt, so i just took pictures. if you're going to do it this way, make sure you take the pictures in goodish lighting.
 |
| fresh photograph, ready to edit |
try to avoid flash as it will reflect off of your picture and make it harder to edit in later steps.
step two: open your image in an image editing program
for this tutorial I am using photoshop cs6 for windows. if you dont have or don't like photoshop, there are alternative cheap/free programs out there. i have used GIMP before, but it is not my favorite.
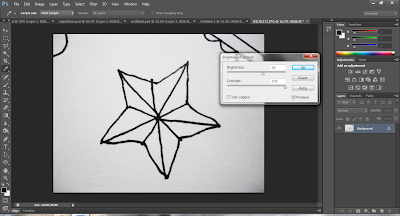
step three: adjust levels

what i am trying to achieve here is a clear, saturated image of my drawing.
when adjusting the brightness and contrast, don't aim to make it black and white, aim to get the clearest, glare free image you can.
if your image is black and white, you might also want to adjust the saturation to make sure your blacks are true black. i didn't bother with this step as i didn't feel it needed it.
step four: get rid of everything but the drawing
this step is doing exactly what it sounds like. generally, i use the magic wand tool for this. select the drawing itself. it may take multiple clicks if your lines aren't totally clear or, obviously if you have a bunch of different colors.
 |
| voila! |
you then want to copy this and paste it on its own new layer. this will leave you with a layer with just your image, and a background layer of the original photo/scan. at this point you can make the background blank, coloured, patterned - whatever you want. i make mine white to begin with.
step five: go crazy!
you can now do whatever you like with the image. if you'd like to go a step further, you can make a custom shape out of your image, which I will do a tutorial on later. now go make something cute!
this whole process really takes about 3 minutes real time, i know the tutorial was long/vague. anyways, thanks so much for reading!


